9.0 Configure your Settings

Configuring your Settings
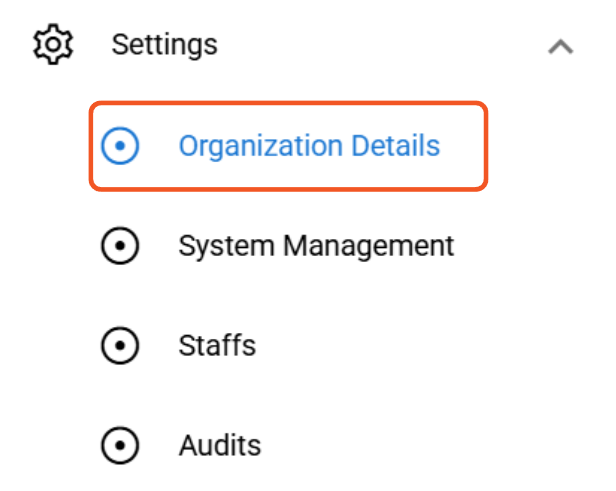
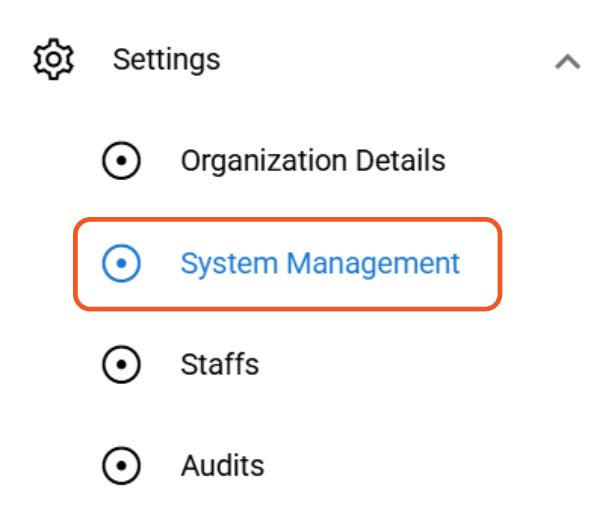
Settings is one of the main menu that consists of 4 submenus which are Organization Details, System Management, Staffs, and Audits.
9.1. Organization Details
Settings -> Organization Details
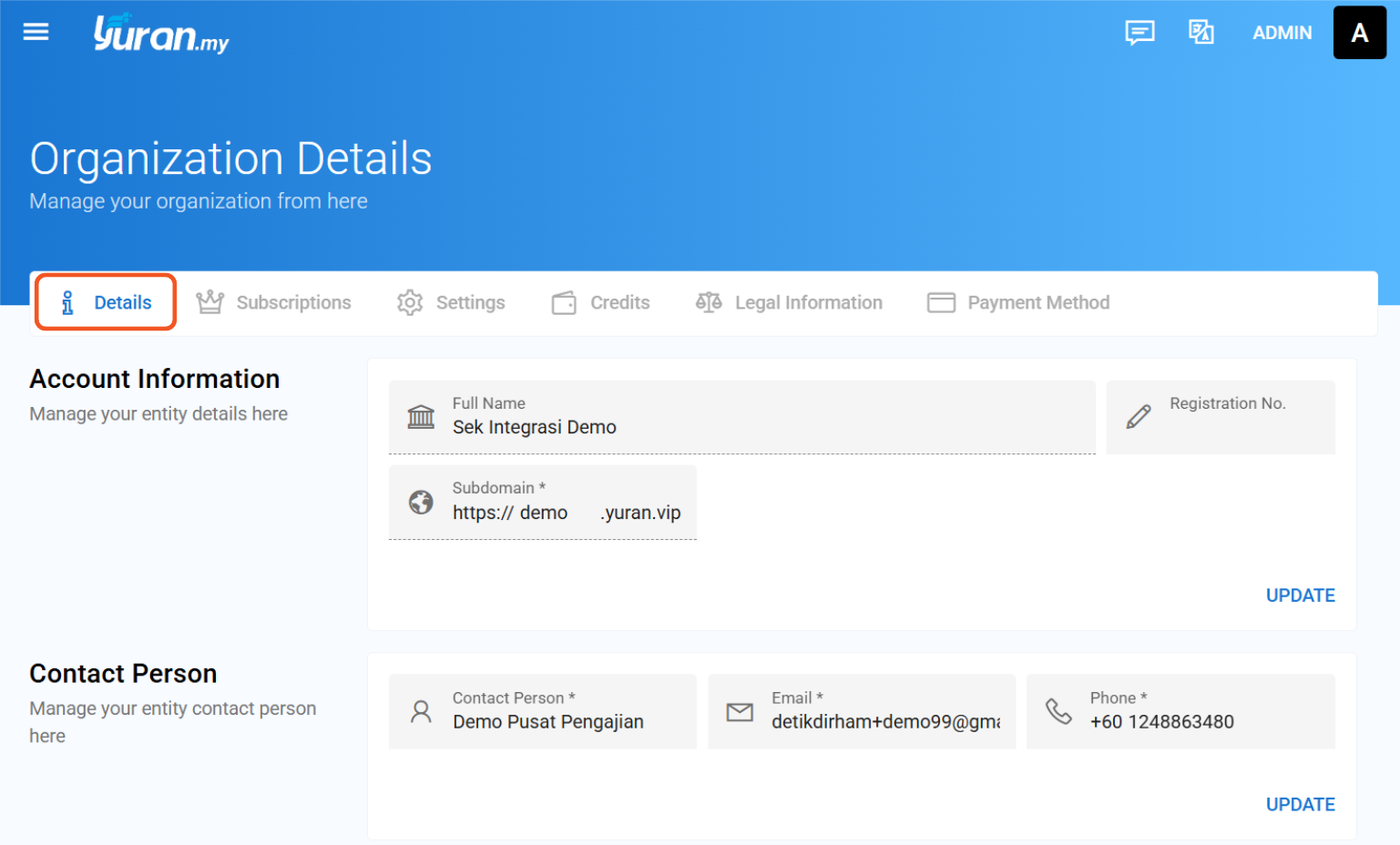
9.1.1 Details
Settings -> Organization Details -> Details
The Details tab lets you view and manage your organization's basic information and branding.
-
Account Information: View your organization’s name and subdomain. You may also enter your registration number.
-
Contact Person: Add or update the main contact person’s name, email, and phone number.
-
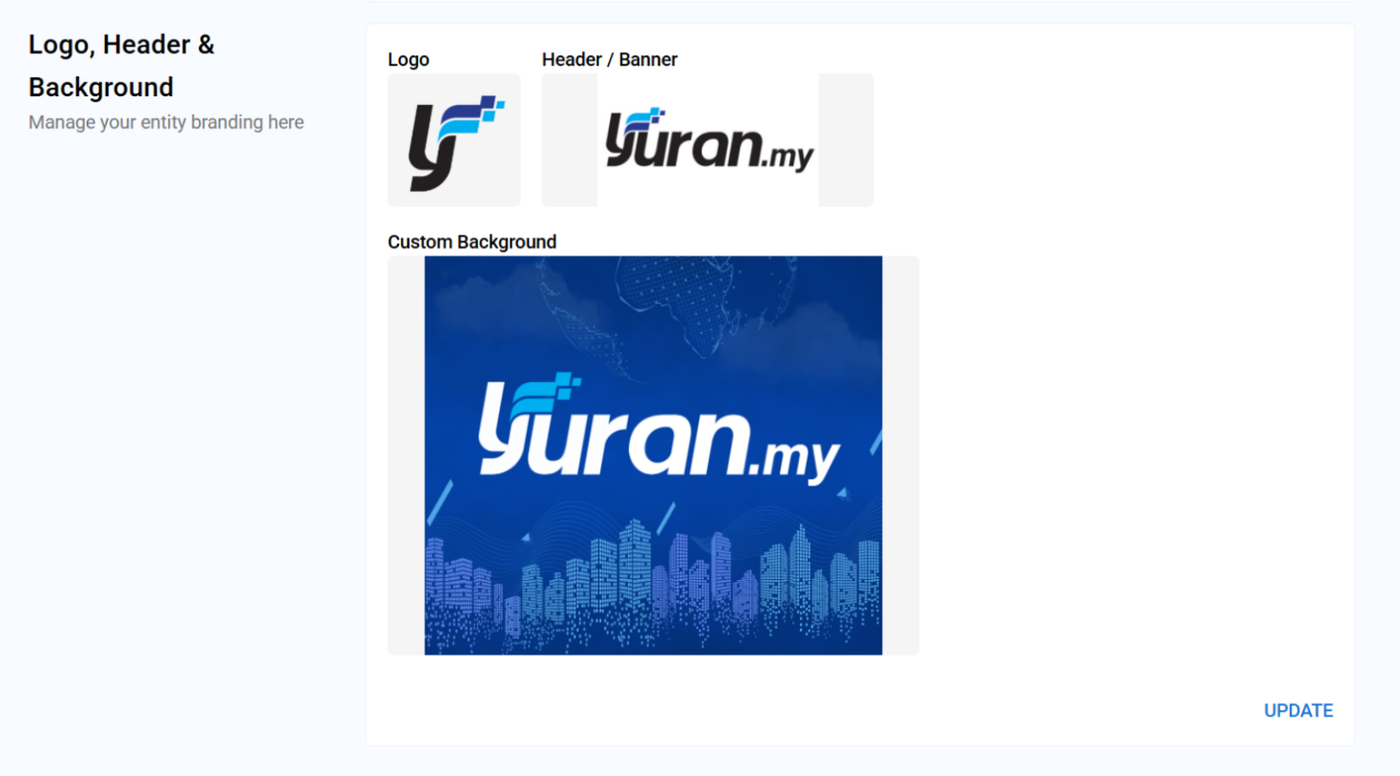
Logo, Header & Background: Customize your login page appearance by uploading your organization’s logo, header/banner, and background image here.
Use this tab to keep your organization’s contact details and branding up to date.
9.1.2 Subscriptions
Settings -> Organization Details -> Subscriptions
The Subscription tab shows the details of your organization's current subscription. You can view the subscription package, features added, expiry date and status.
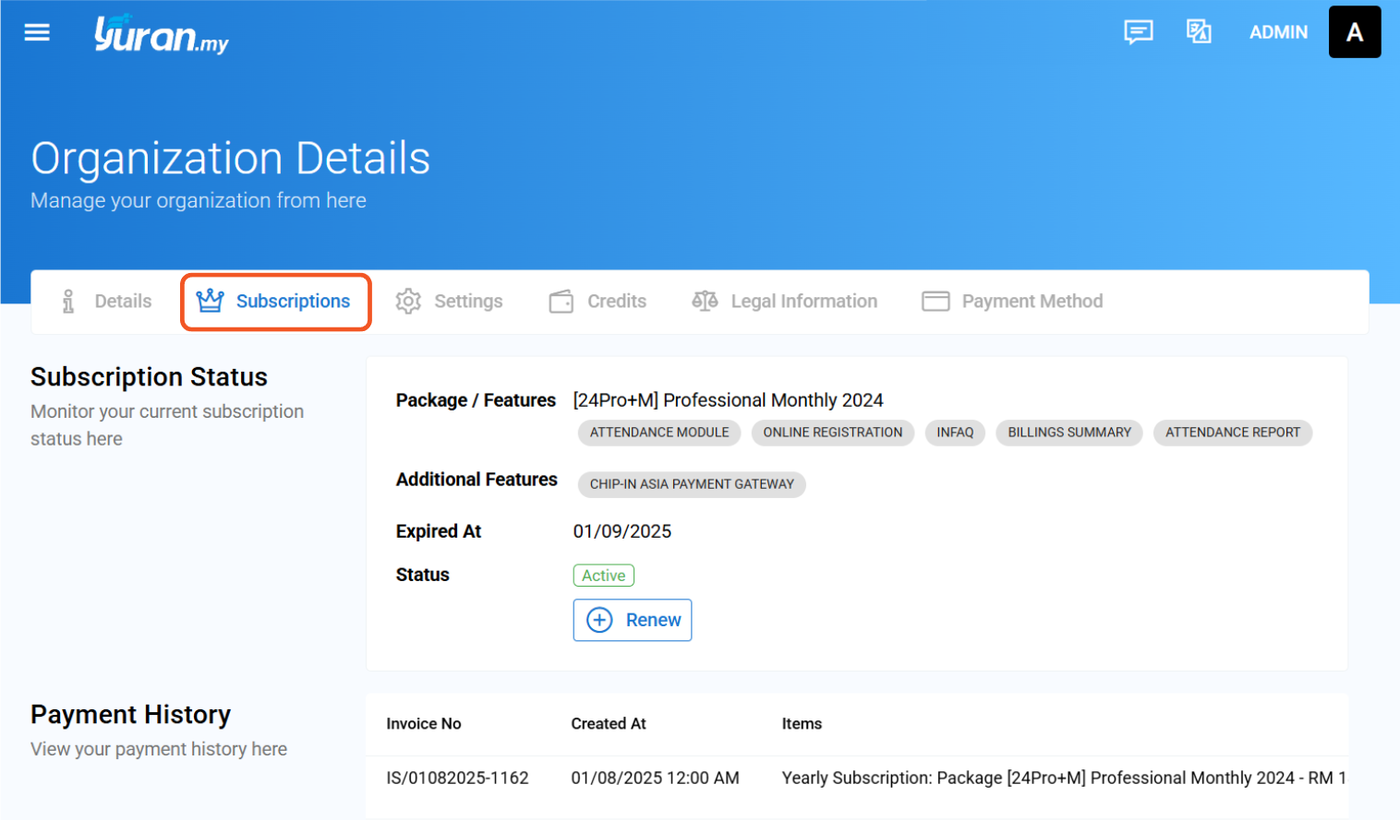
9.1.2.1 How to Renew Yuran.my Subscription
Step 1: Go to Settings -> Organization Details -> Subscriptions
Step 2: Click "Renew" button
9.1.3 Settings
Settings -> Organization Details -> Settings
In the Settings tab, you can manage important preferences for your organization:
- Application Approval: Enable or disable auto-approval for online registration forms. If checked, new applications will be approved automatically without manual review.
-
Invoice Notification: Set how your end users will receive invoice notifications. You can choose to send them via SMS, WhatsApp, Email, or Push Notification.
-
Receipt Notification: Set how your end users will receive receipt notifications. Options include SMS, WhatsApp, Email, or Push Notification.

>>> Go to Online Registration Management >>>
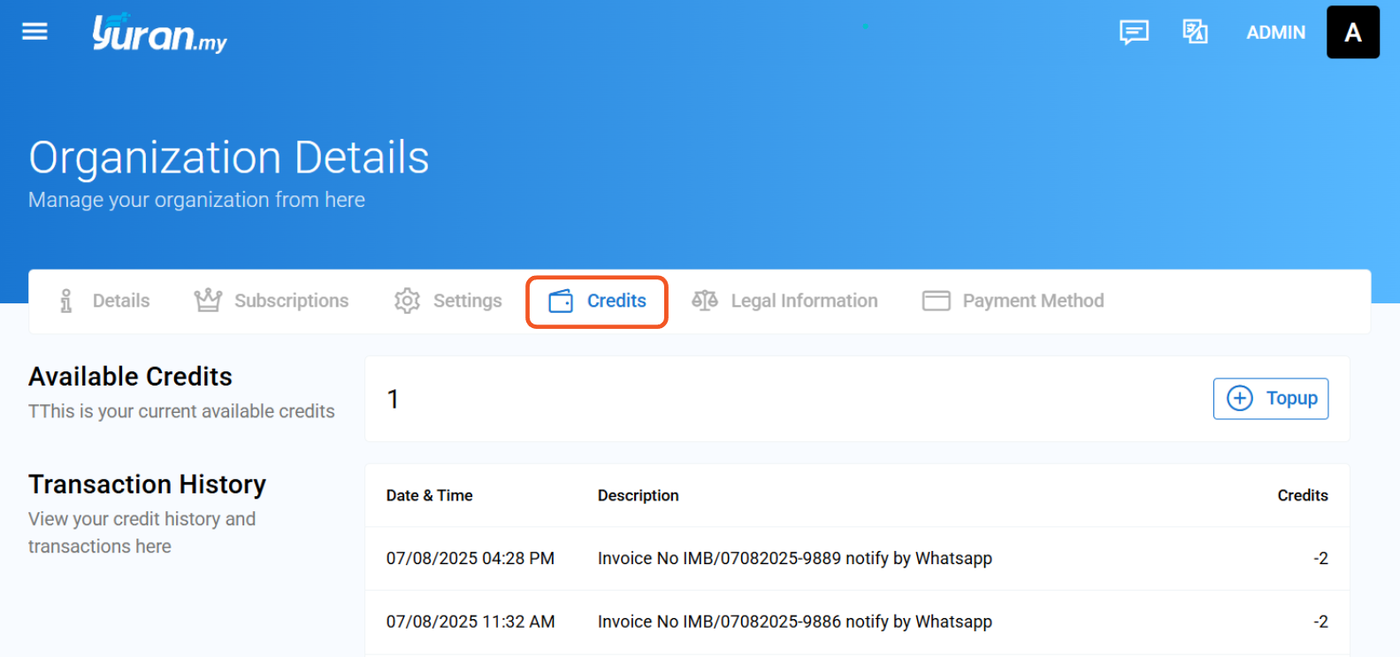
9.1.4 Credits
Settings -> Organization Details -> Credits
The Credits tab shows your organization's current credit balance and credit usage history.
-
Available Credits: Displays how many credits you currently have left. Credits are used for certain notifications like SMS and WhatsApp.
-
Transaction History: View all credit usage records, including the date, time, description, and the number of credits used.
Use this tab to monitor your credit balance and track how your credits are being spent.
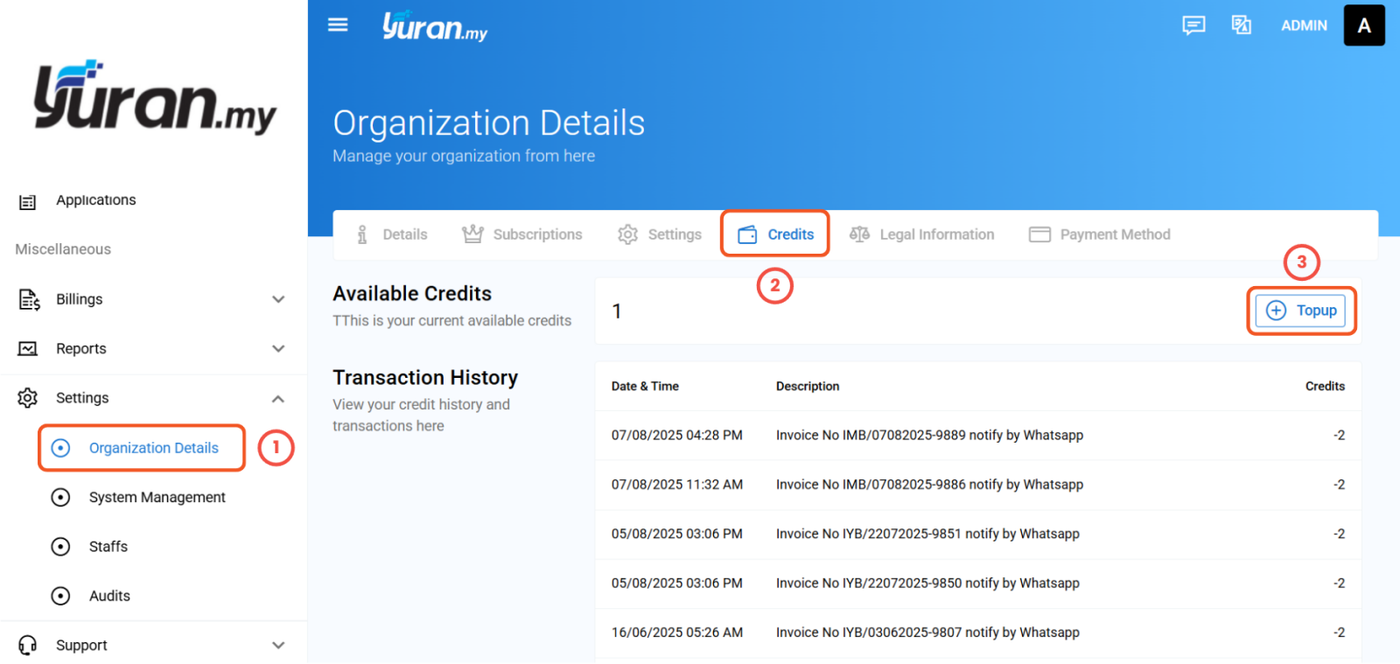
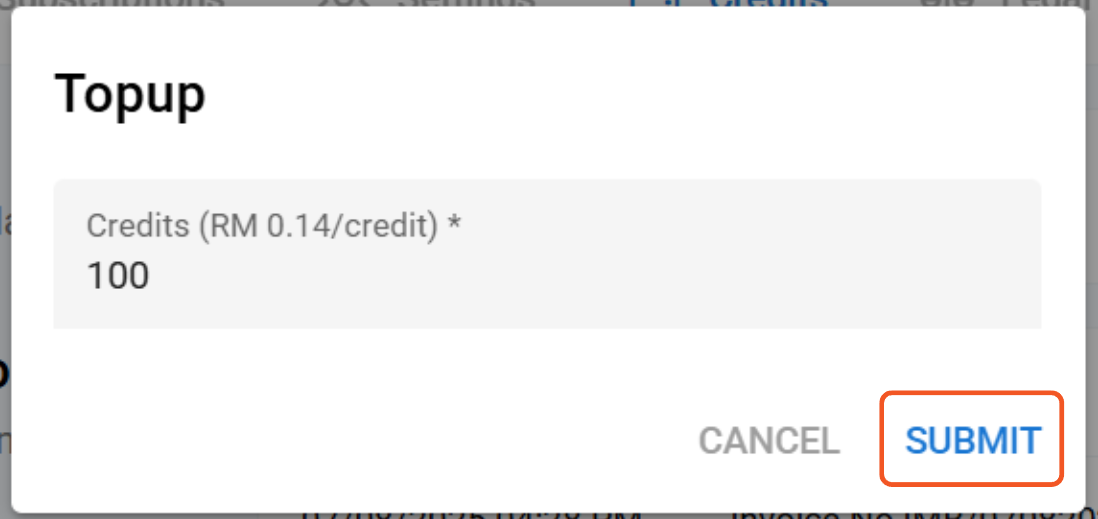
9.1.4.1 How to Topup Credits
Step 1: Go to Organization Details -> Credits -> Topup
Step 2: Enter the amount of credit you want to add then click "Submit".
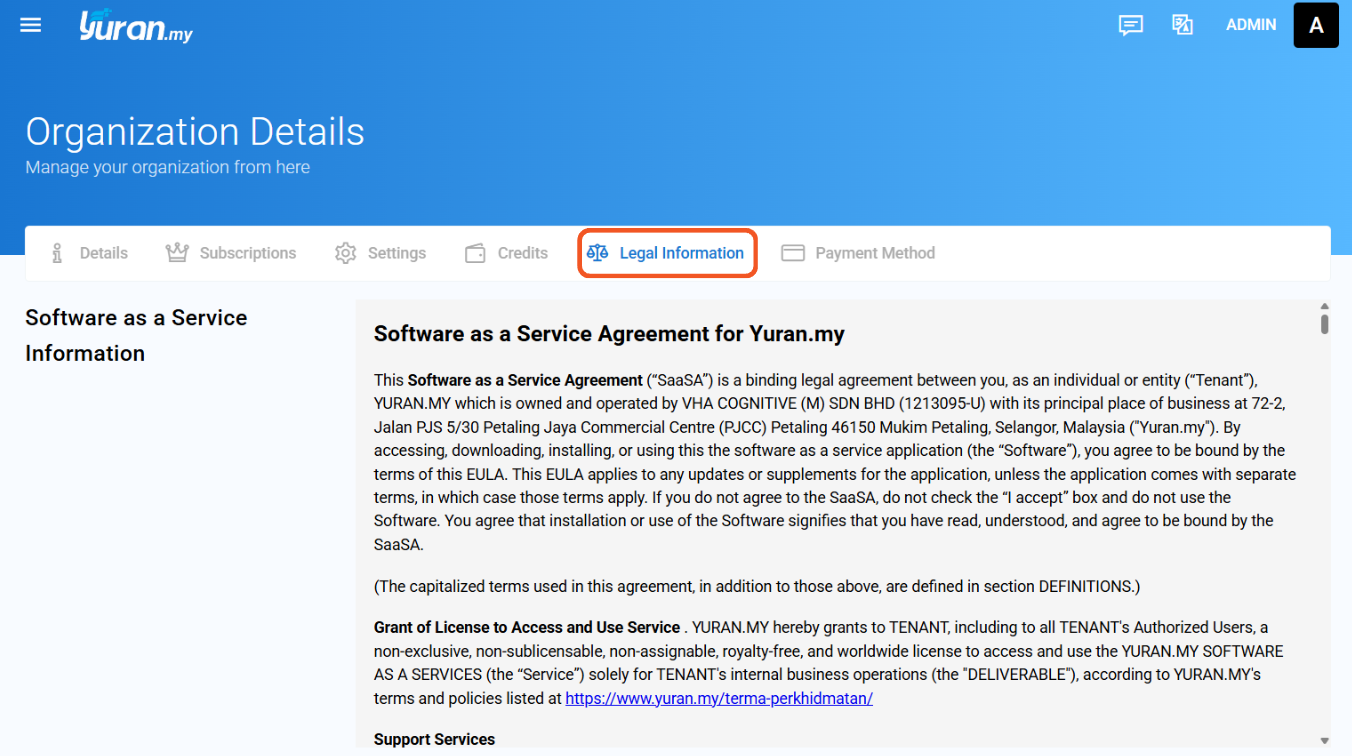
9.1.5 Legal Information
Settings -> Organization Details -> Legal Information
The Legal Information tab provides access to important legal documents related to the use of Yuran.my. These include:
-
Software as a Service Information
-
Yuran.my End User Agreement
-
Privacy and Policy
-
Terms of Service
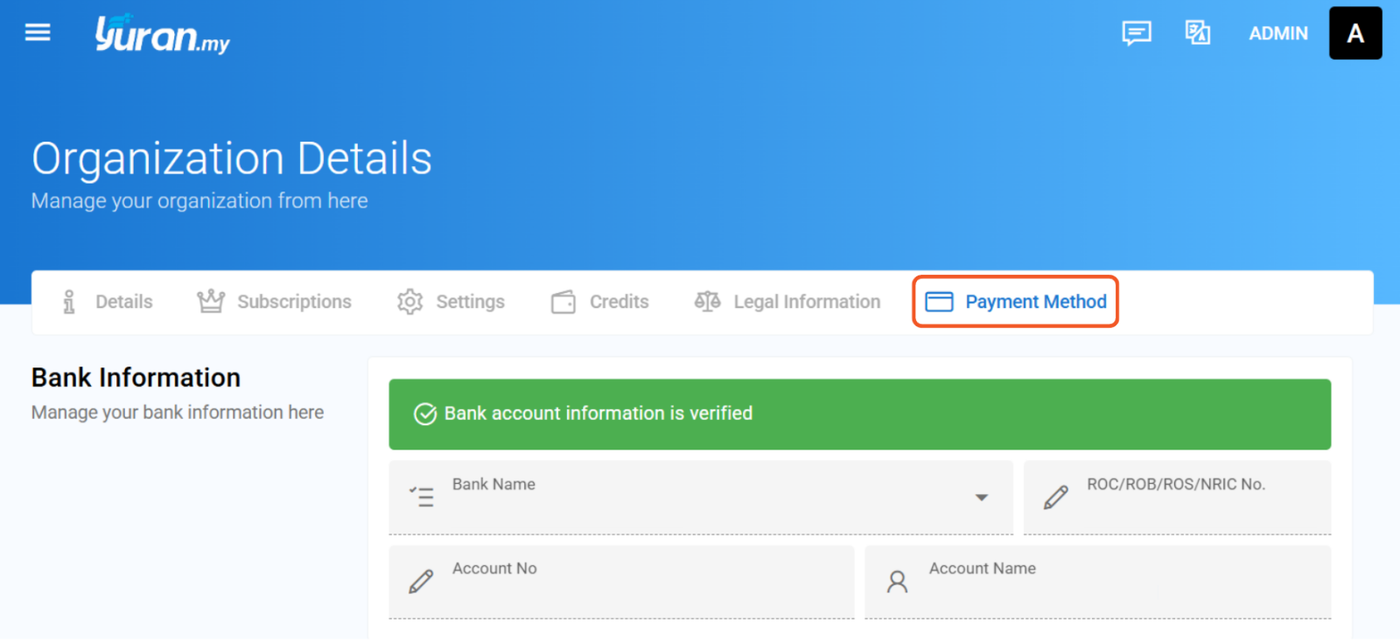
9.1.6 Payment Method
Settings -> Organization Details -> Payment Method
The Payment Method tab displays and manages your organization’s bank account details for receiving payments.
-
Bank Information: View or update your registered bank name, account number, account name, and company registration number (ROC/ROB/ROS/NRIC).
9.2 System Management
Settings -> System Management
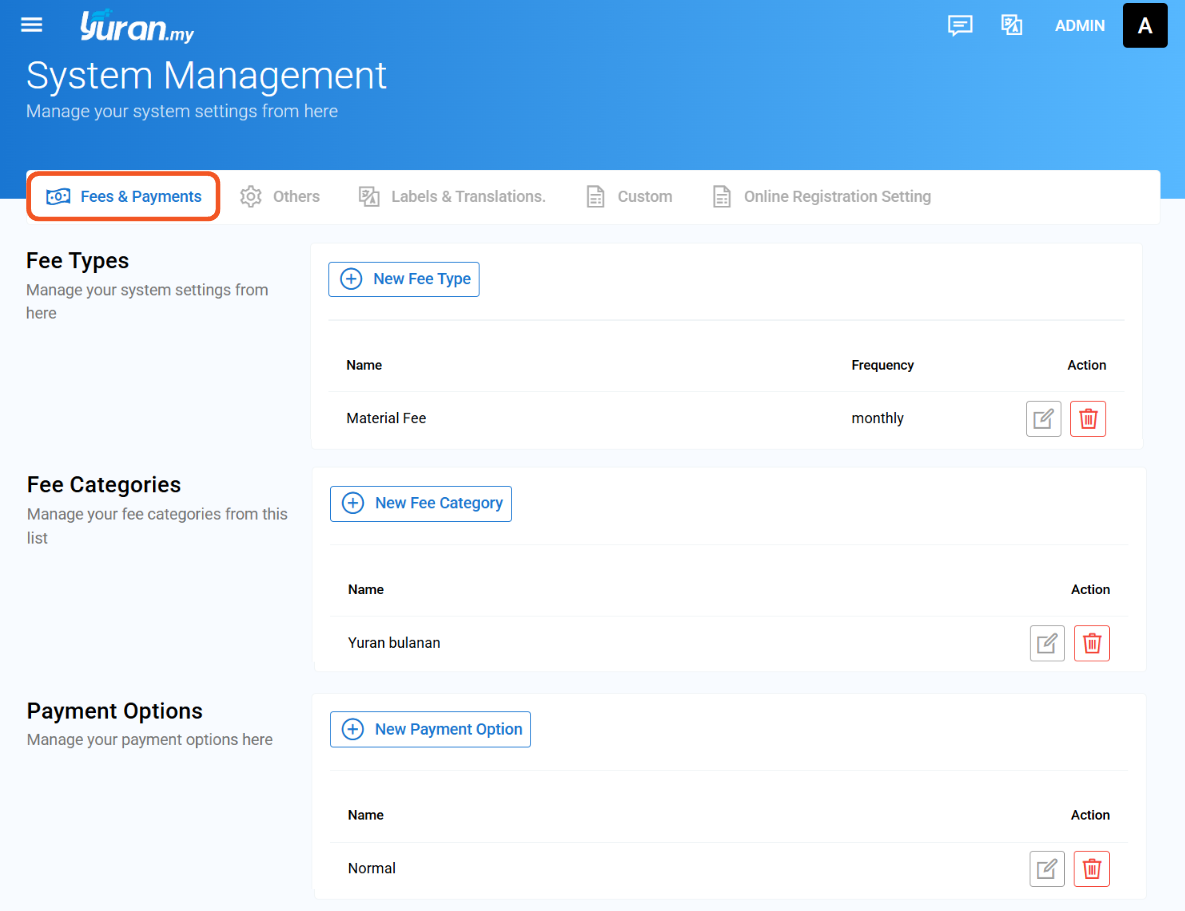
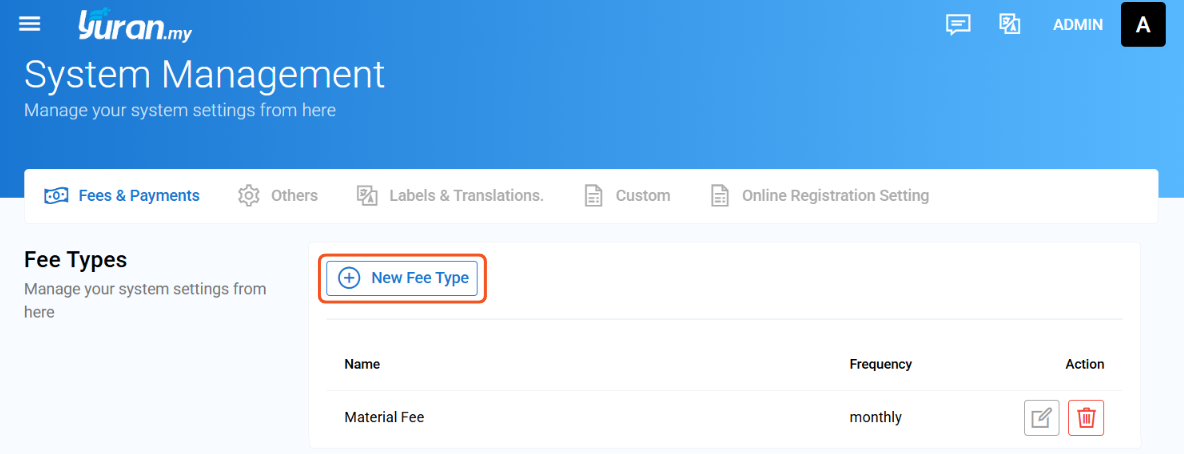
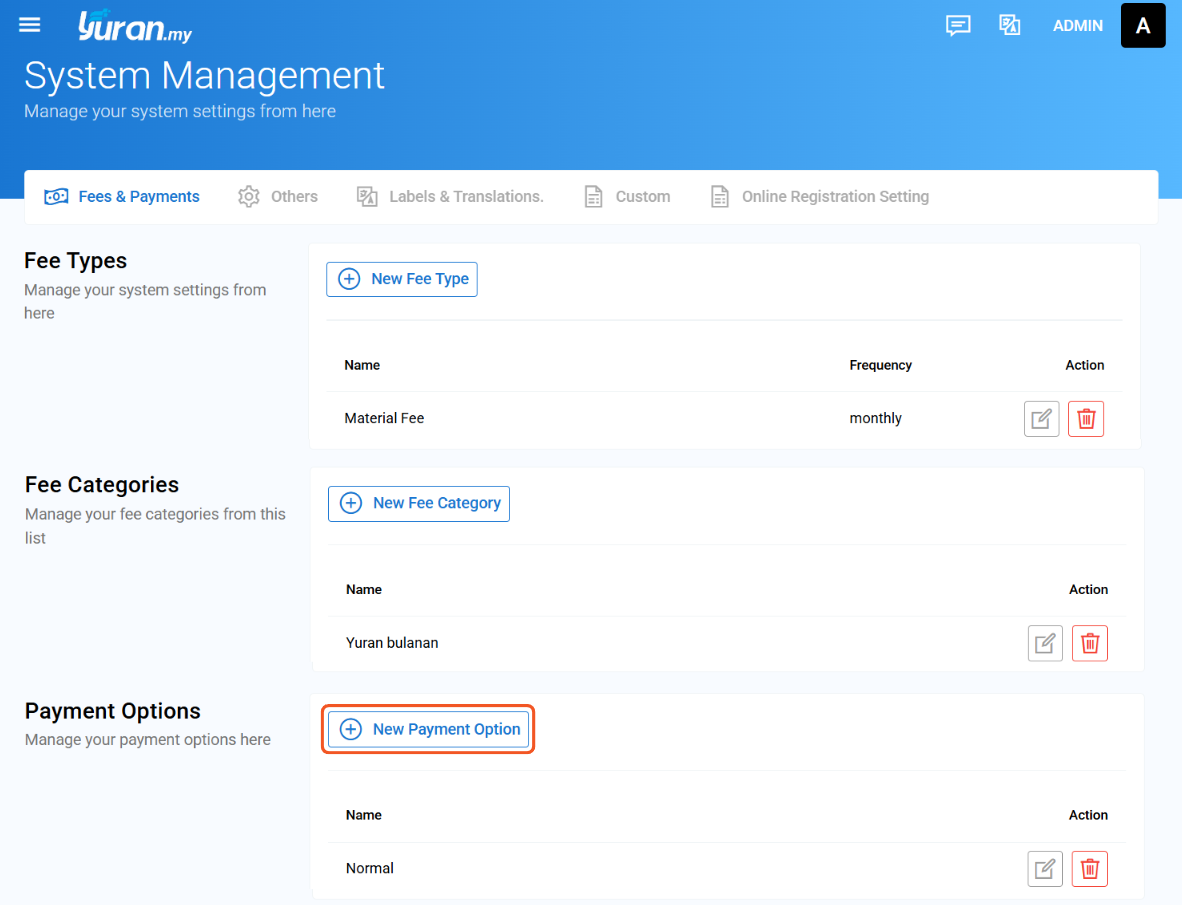
9.2.1 Fees & Payments
Settings -> System Management -> Fees & Payments
The Fees & Payments tab allows you to manage all fee-related settings in the system.
-
Fee Types: Create and manage different types of fees. You can also set how often each fee is charged (e.g., monthly, yearly, one-off).
-
Fee Categories: Group fees into categories to help with organization and reporting.
-
Payment Options: Set up available payment options or terms for your users.
Use this tab to define your organization's complete fee and payment structure.
9.2.1.1 Fee Types
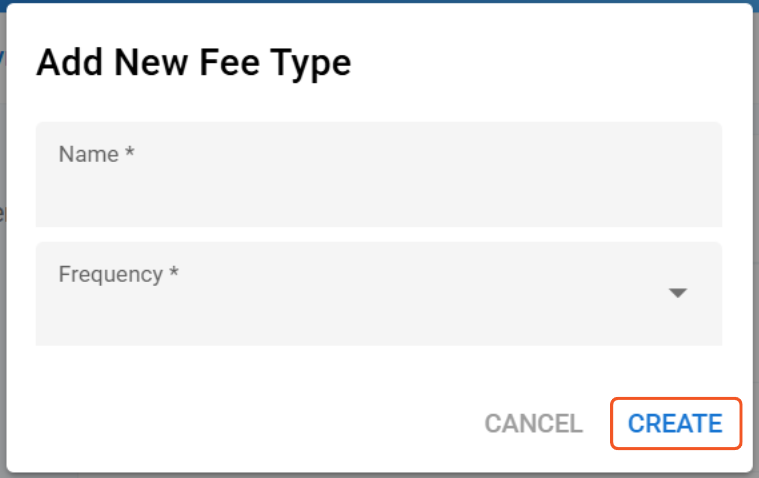
9.2.1.1.1 How to Create New Fee Type
Step 1: Click the "New Fee Type" button to create a new fee type.
Step 2: Once click the New Fee Type button, Add New Fee Type form appear. Fill in the information needed and click "Create" button to save the data.
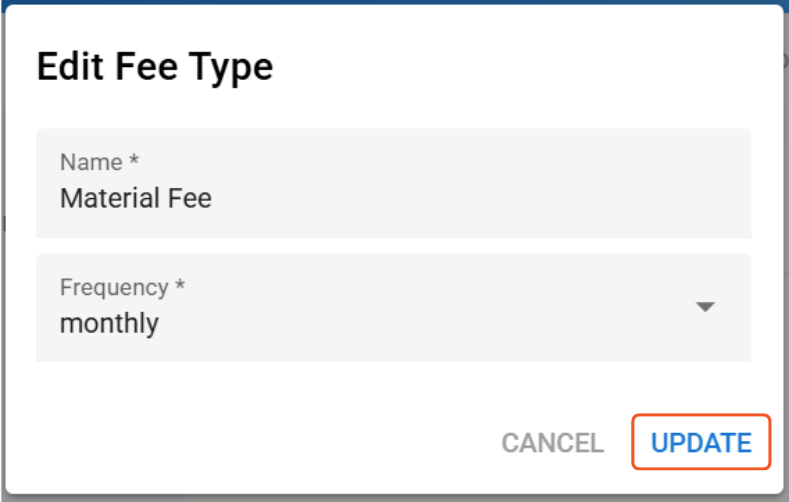
9.2.1.1.2 How to Edit Existing Fee Type
Step 1: Click the Edit icon at the Action section of the Fee Type.

Step 2: Update the required field in the Edit Fee Type form and click "Update" to save the data.
9.2.1.1.3 How to Delete Existing Fee Type
Step 1: Click the Delete icon at the Action section of the Fee Type.

Step 2: Delete message will appear. Click "Remove" to delete the Fee Type.

9.2.1.2 Fee Categories
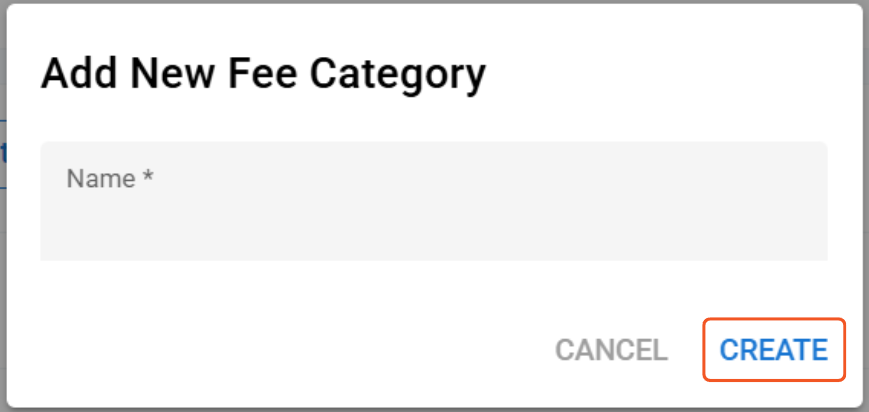
9.2.1.2.1 How to Create New Fee Category
Step 1: Click New Fee Category button to create a new fee category.
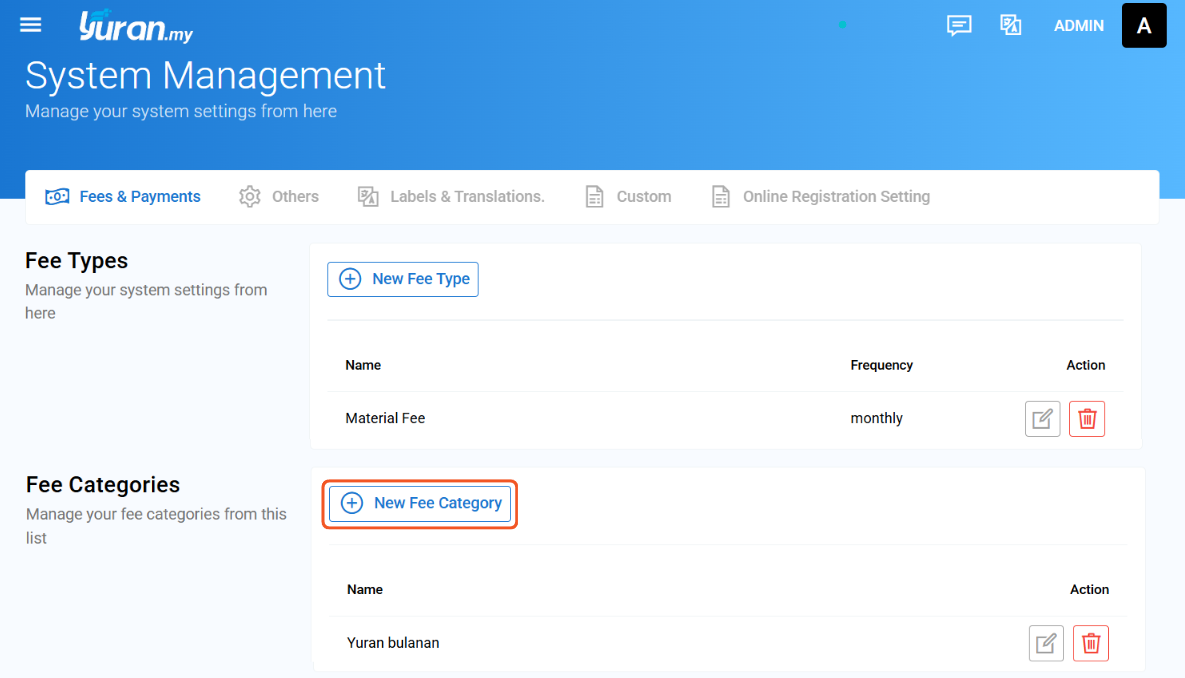
Step 2: Once user click the New Fee Category button, Add New Fee Category form will appear. Fill in the information needed and click Create button.
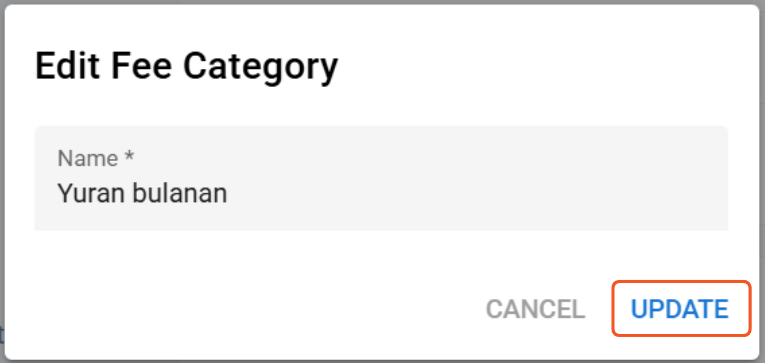
9.2.1.2.2 How to Edit Existing Fee Category
Step 1: Click the Edit icon at the Action section of Fee Category.

Step 2: Update the required field in the Edit Fee Category form and click "Update" to save the data.
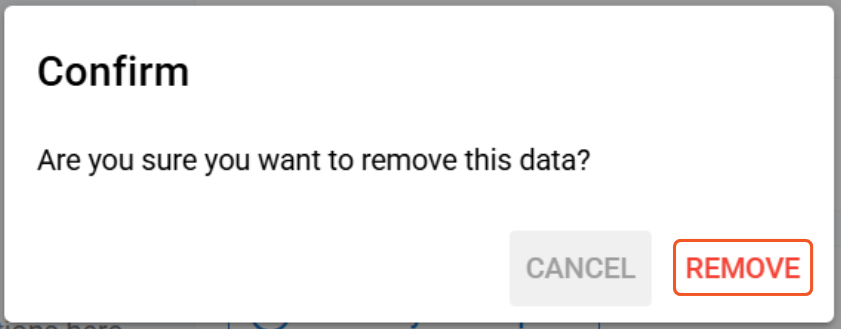
9.2.1.2.3 How to Delete Existing Fee Category
Step 1: Click the Delete icon at Action section of the Fee Category.

Step 2: Delete message will appear. Click "Remove" to delete the Fee Category.
9.2.1.3 Payment Options
9.2.1.1.1 How to Create New Payment Option
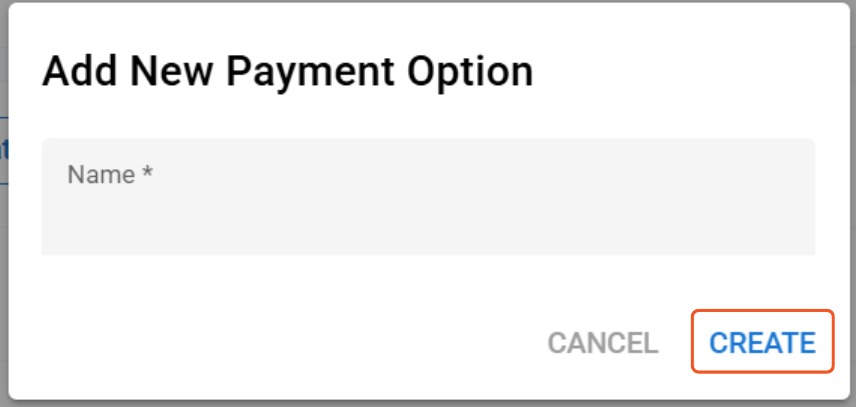
Step 1: Click New Payment Option button to create a new payment option.
Step 2: Once user click the New Payment Option button, Add New Payment Option form will appear. Fill in the information needed and click Create button.
9.2.1.1.2 How to Edit Existing Payment Option
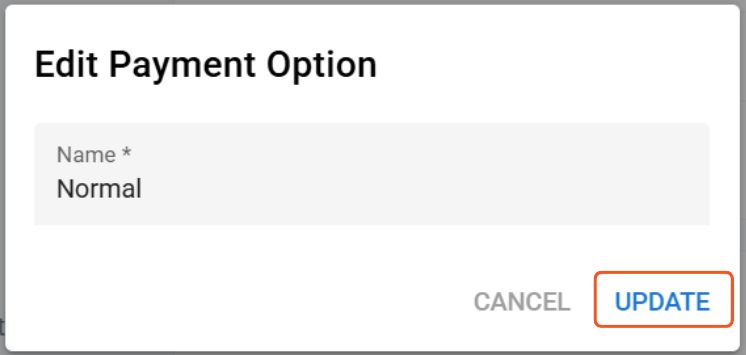
Step 1: Click the Edit icon at the Action section of Payment Options.

Step 2: Update the required field in the Edit Payment Option form and click "Update" to save the data.
9.2.1.1.3 How to Delete Existing Payment Option
Step 1: Click the Delete icon at Action section on the Payment Options.

Step 2: Delete message will appear. Click "Remove" to delete the Payment Option.

9.2.2 Others
The Others tab allow you to manage additional settings in your system such as departments and infaq types.
- Departments: Add, edit or delete your organization's department. Use this to organize staff or trainers.
- Infaq Type: Add, edit or delete different type of infaq that your organization collects. This helps categorize contributions clearly.
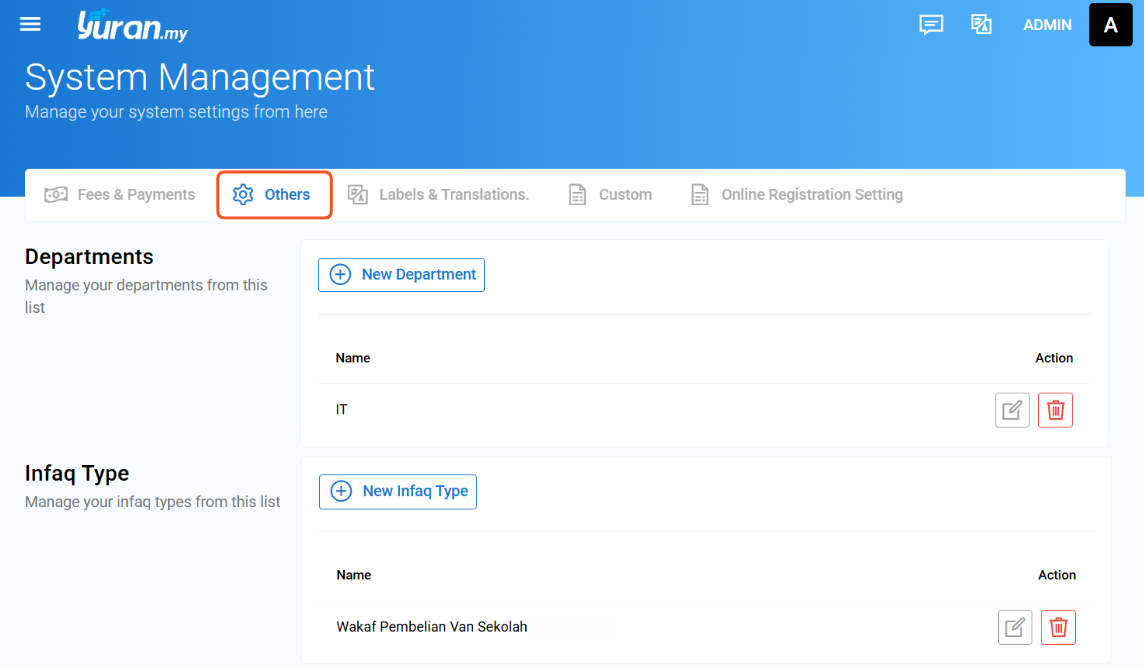
>>>Go to Infaq Management Guide <<<
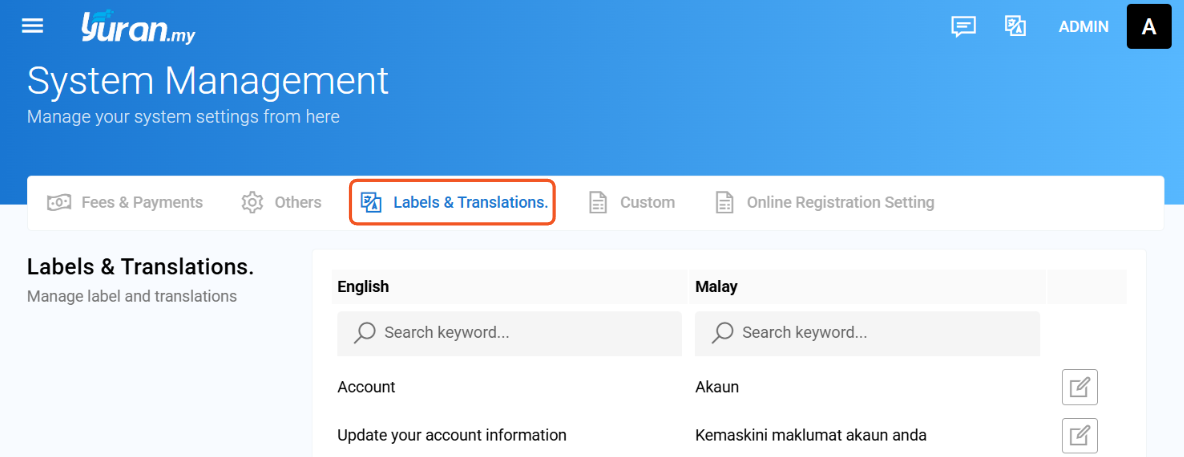
9.2.3 Labels & Translations
In the Labels & Translations tab, you can manage system text labels in both English and Malay. This tab allows you to view, search, and edit translations for language display across the platform.
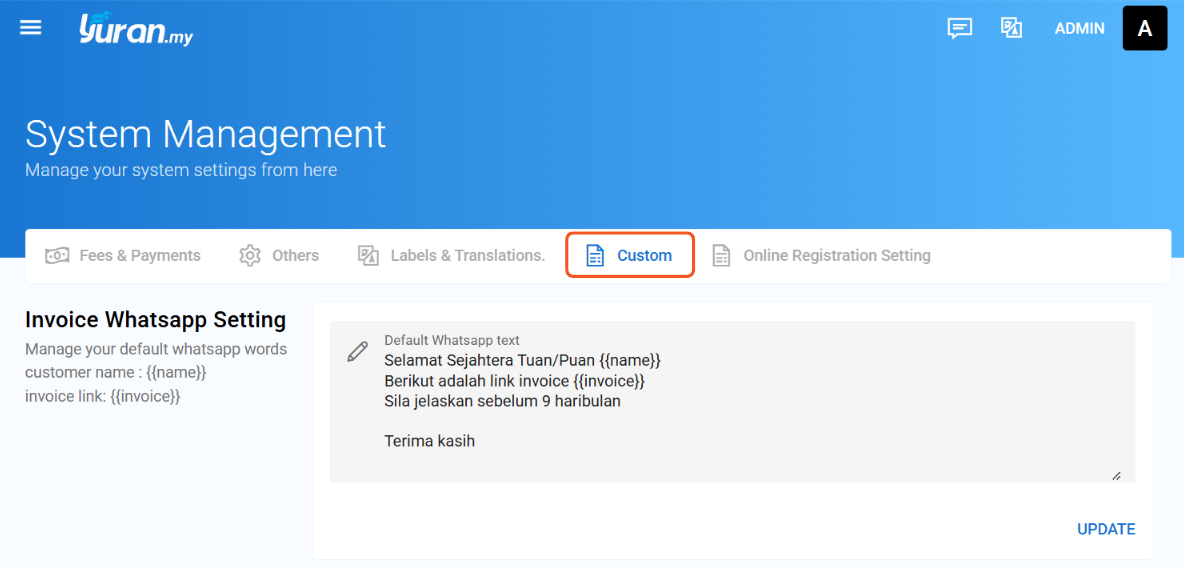
9.2.4 Custom
In the Custom tab, you can configure the default WhatsApp message content used for sending invoice notifications. This tab allows you to personalize how invoice reminders are communicated via WhatsApp.
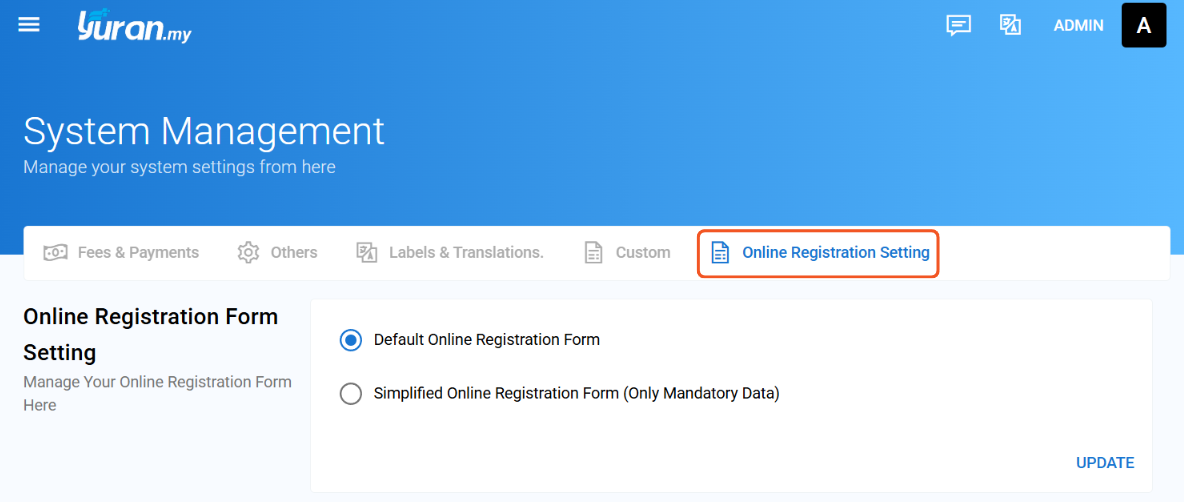
9.2.5 Online Registration Setting
In the Online Registration Setting tab, you can change how the registration shown during the online registration process either Default form or Simplified form.
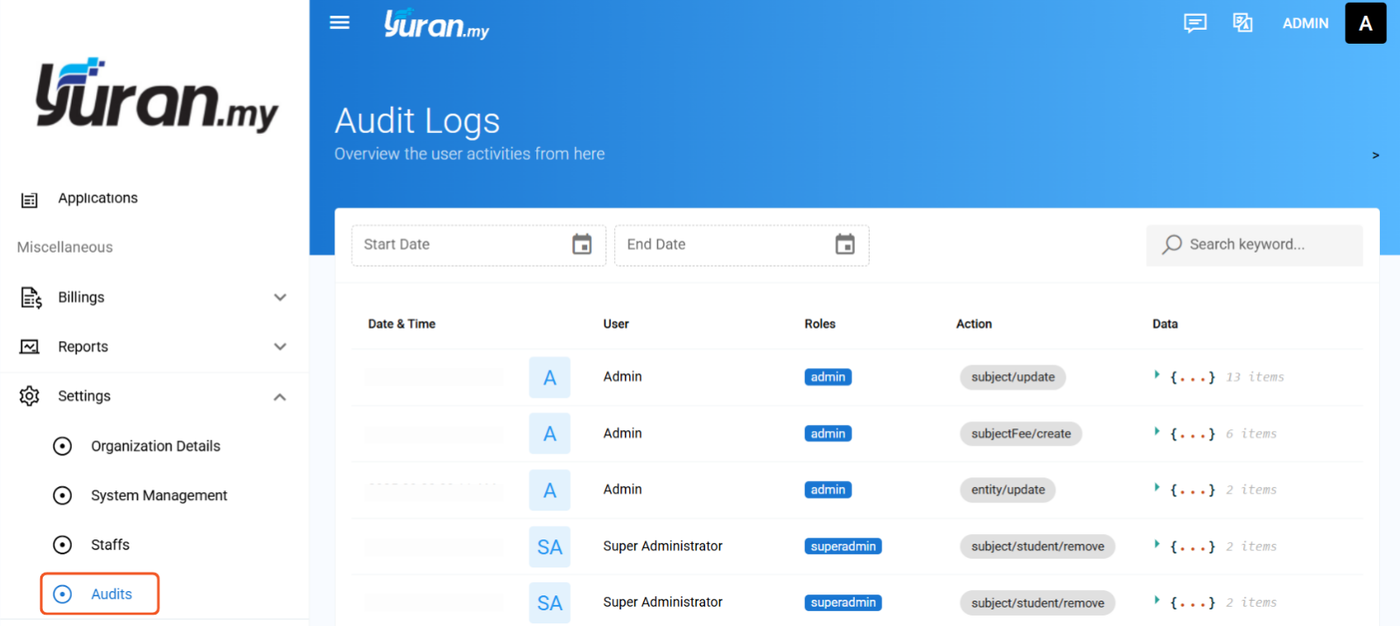
9.3 Audits
Settings -> Audits
The Audit Logs tab shows a list of all user activities in the system. You can view the date and time of each action, the user who performed it, their role, and the type of action taken. This helps track changes and monitor user activity for accountability.