12.0 Smart Attendance

Attendance module is one of the new features in Yuran.my System version 3. This attendance feature will able to help in managing the class/event attendance.
12.1 How to Create a New Attendance?
Step 1: Click Programs > Classes/Events at the left panel under Management category.
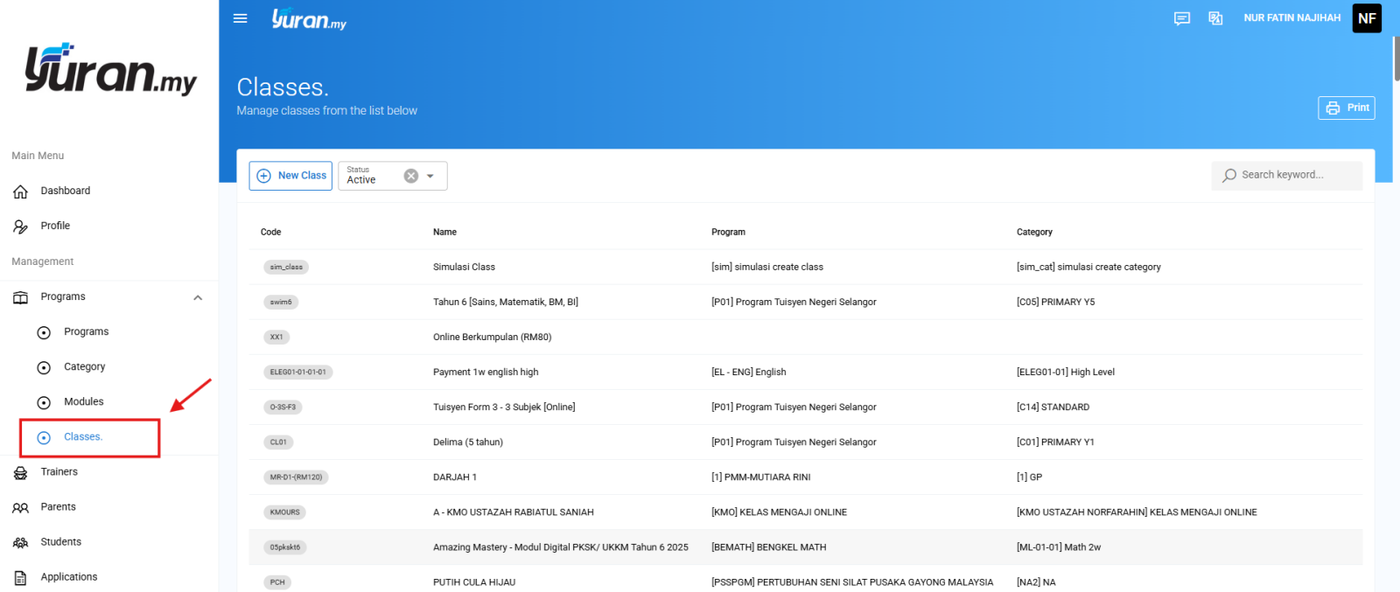
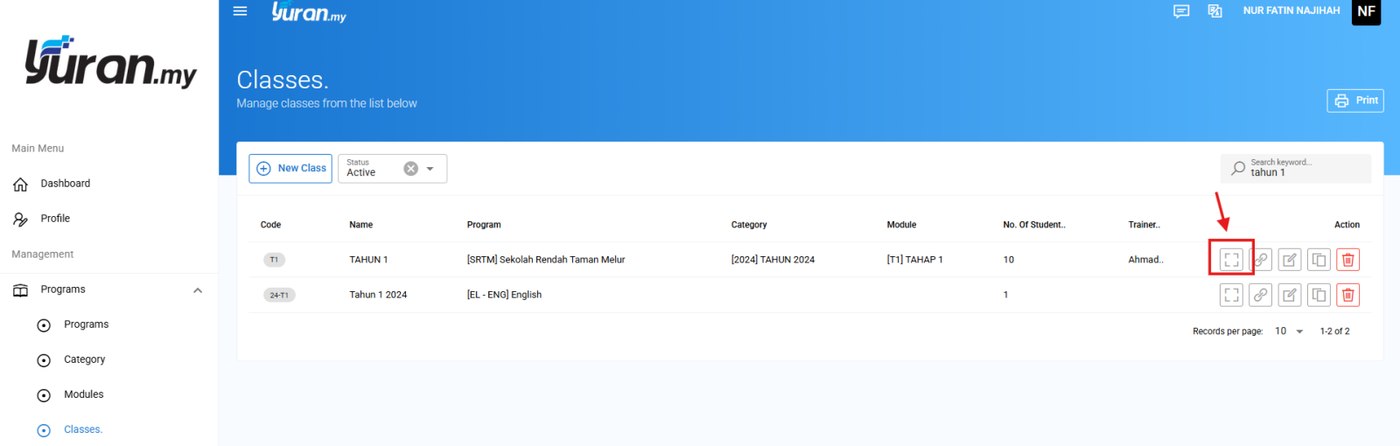
Step 2: Click the View icon to create Attendance for the existing class. If the class is not existing yet, user able to create a new class by clicking the New Class button.
* For more details on creating a new class, refer User Guide 1.0 Preparing your Yuran.my System V3.
* View icon

Step 3: Click the Attendance navigation. Then, Attendance page will appear.
* Attendance navigation
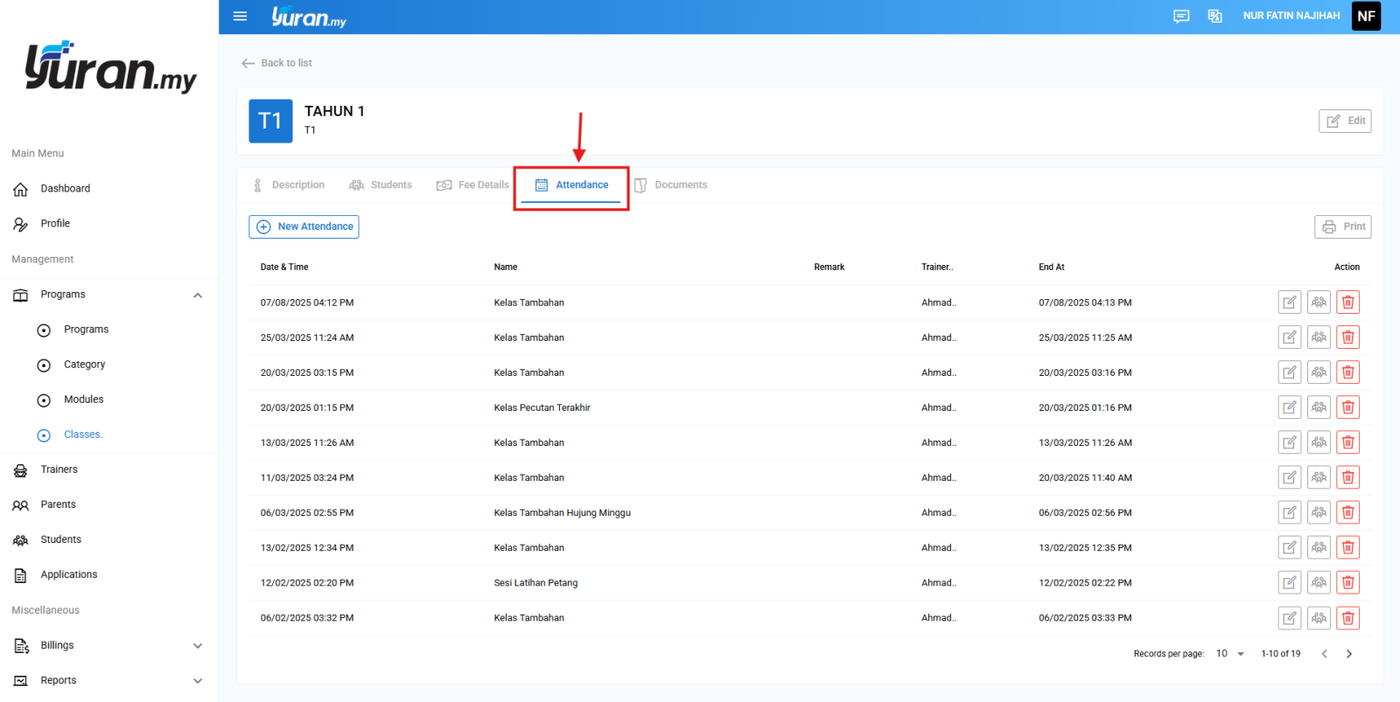
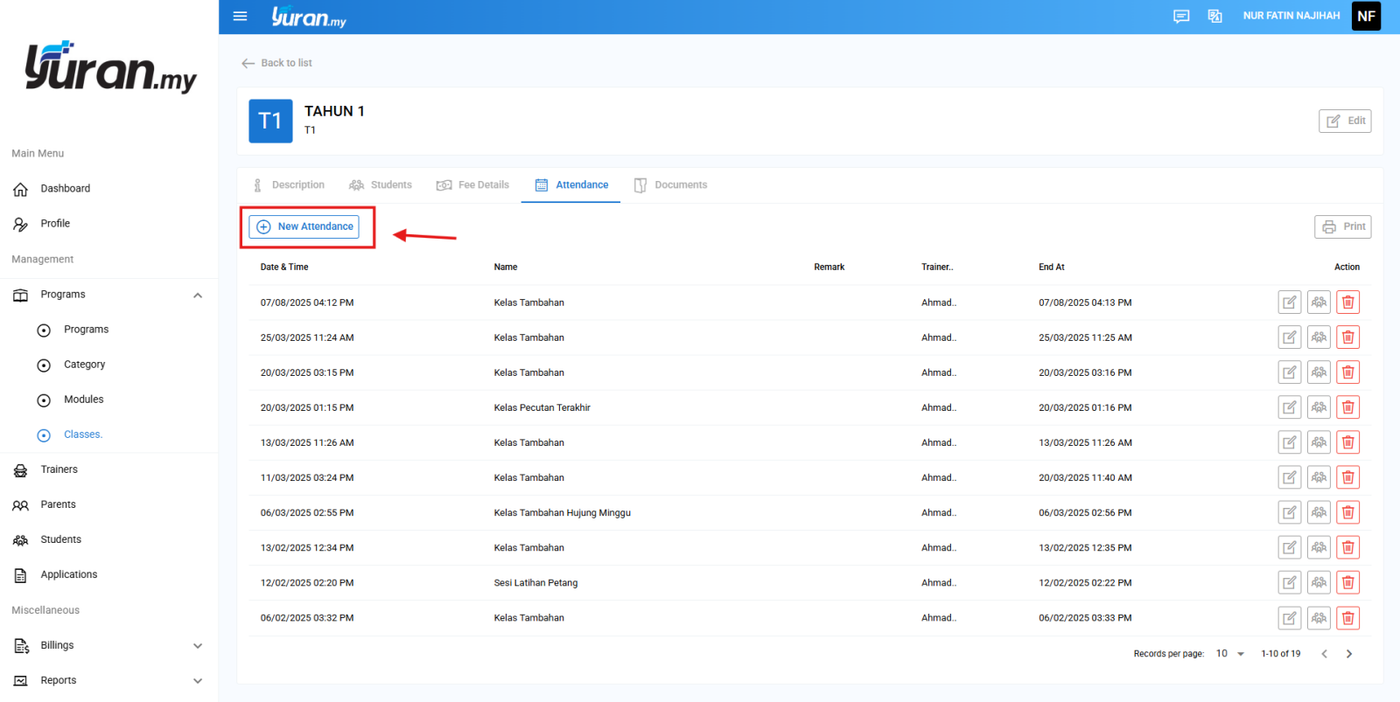
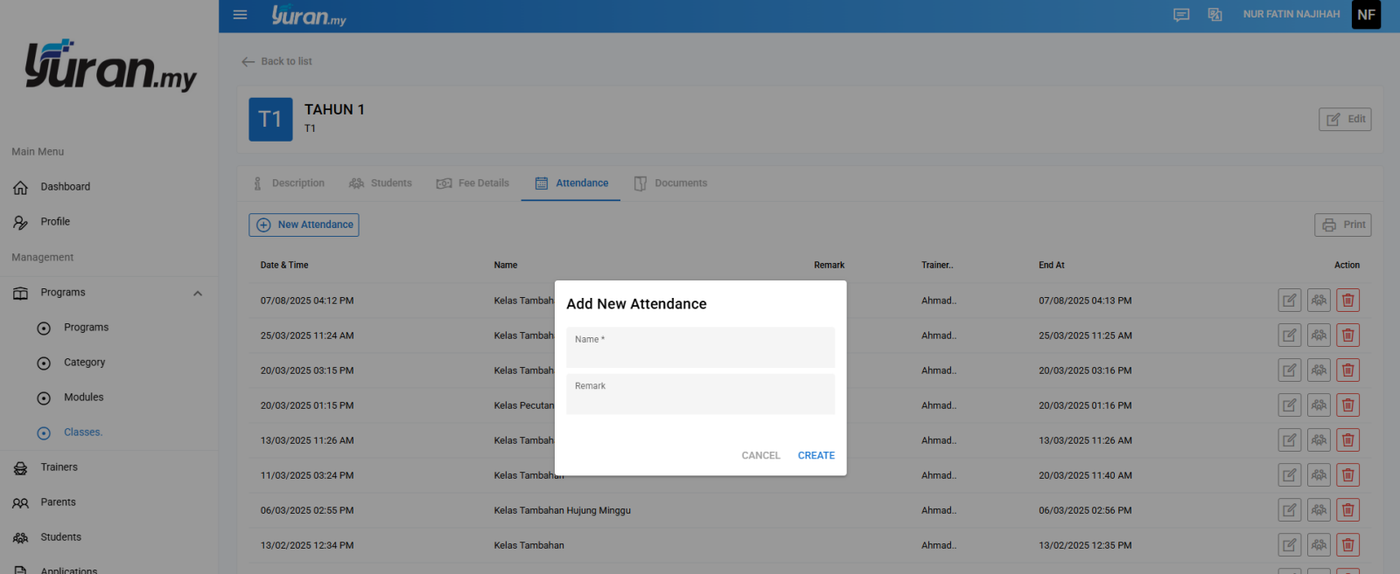
Step 5: Click the New Attendance button, Add New Attendance form will appear.
* Add New Attendance button
Step 6: The created attendance will appear on the Attendance page.

12.2 How to Edit the Existing Attendance?
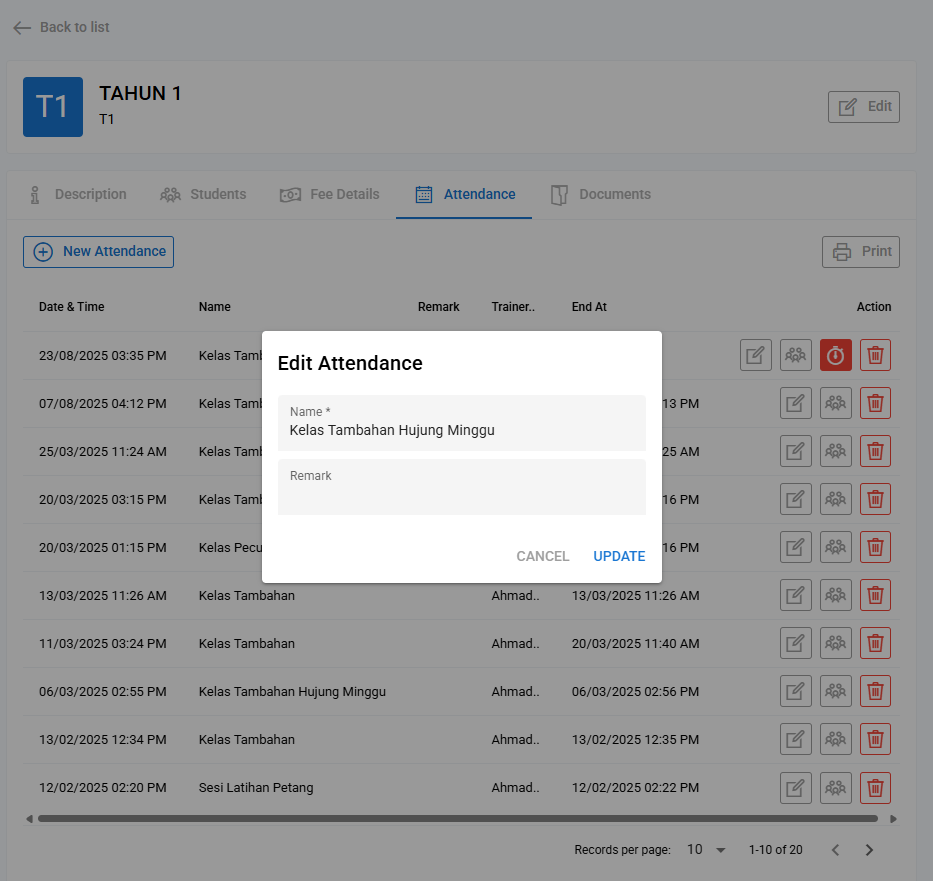
Step 1: Click the Edit icon at the Action section Attendance page.
* Edit icon


Step 2: Once clicking the Edit icon, Edit Attendance form will appear. User able to change the information and click Update button to save.
12.3 How to Manage the Existing Attendance?
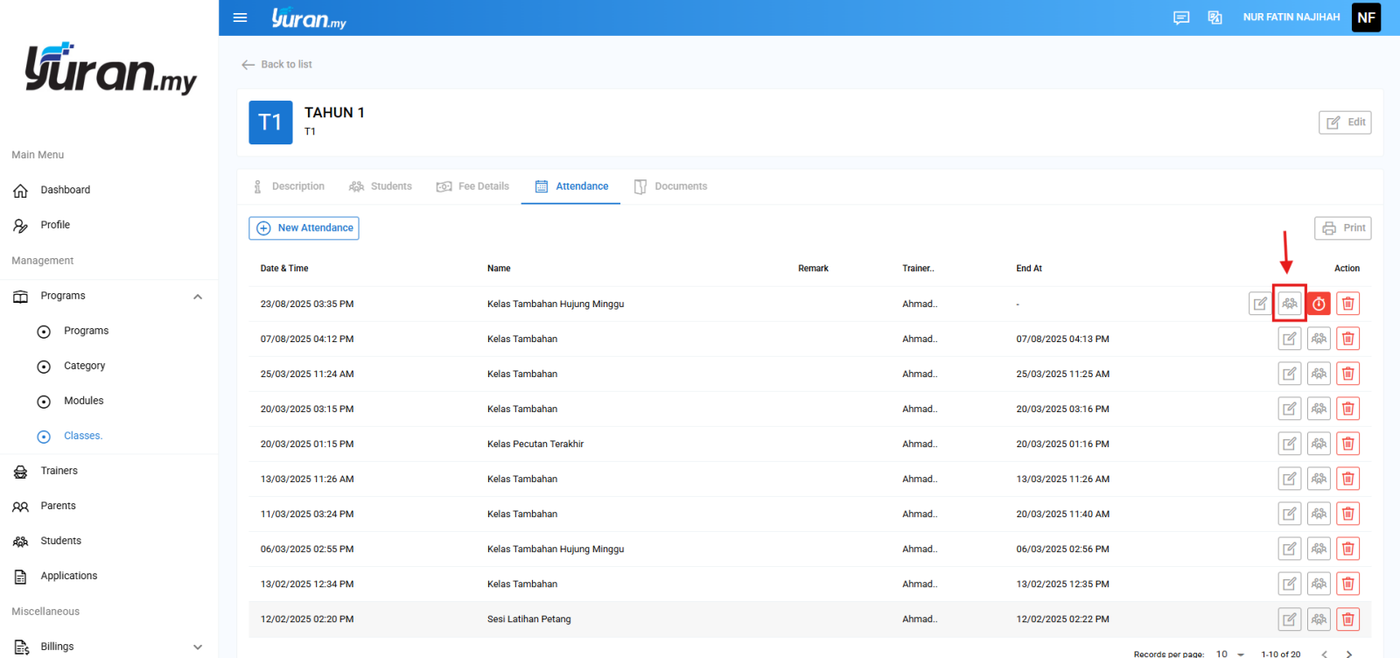
Step 1: Click the Students icon at the Action section Attendance page.
* Students icon

Step 2: Once clicking the Students icon, Student Attendance form will appear.

Step 3: At this page, user able to tick the student who attending the class/event and write the remark as a references or reasons for not attending the class.

12.4 How to End Session for the Existing Attendance?
Step 1: Click the End icon at the Action section Attendance page.
* End icon


Step 2: Once clicking the End icon, a message will appear as confirmation to end the class session.

Step 3: If user click the END button, the class session will be ended and recorded.

12.5 How to Delete the Existing Attendance?
Step 1: Click the Delete icon at the Action section Attendance page.
* Delete icon


Step 2: Once clicking the Delete icon, a delete message will appear as a confirmation.

Video Tutorial